
Kochava - New User Acquisition Campaign
🚧IMPORTANT NOTE - PRIVACY PROFILES
Before proceeding, please set up and enable your corresponding privacy profiles. Please be sure to have ATT opt-out profile (for iOS only) and probabilistic matching settings profile (Android and iOS separately). Privacy profile documentation available here https://support.kochava.com/create-manage-apps/creating-and-editing-privacy-profiles/
This guide does not cover privacy profile setup because it's unique per client and any privacy profile adjustment and setup must be done with your primary contact at Kochava.
Partner Configuration
Enable Appier
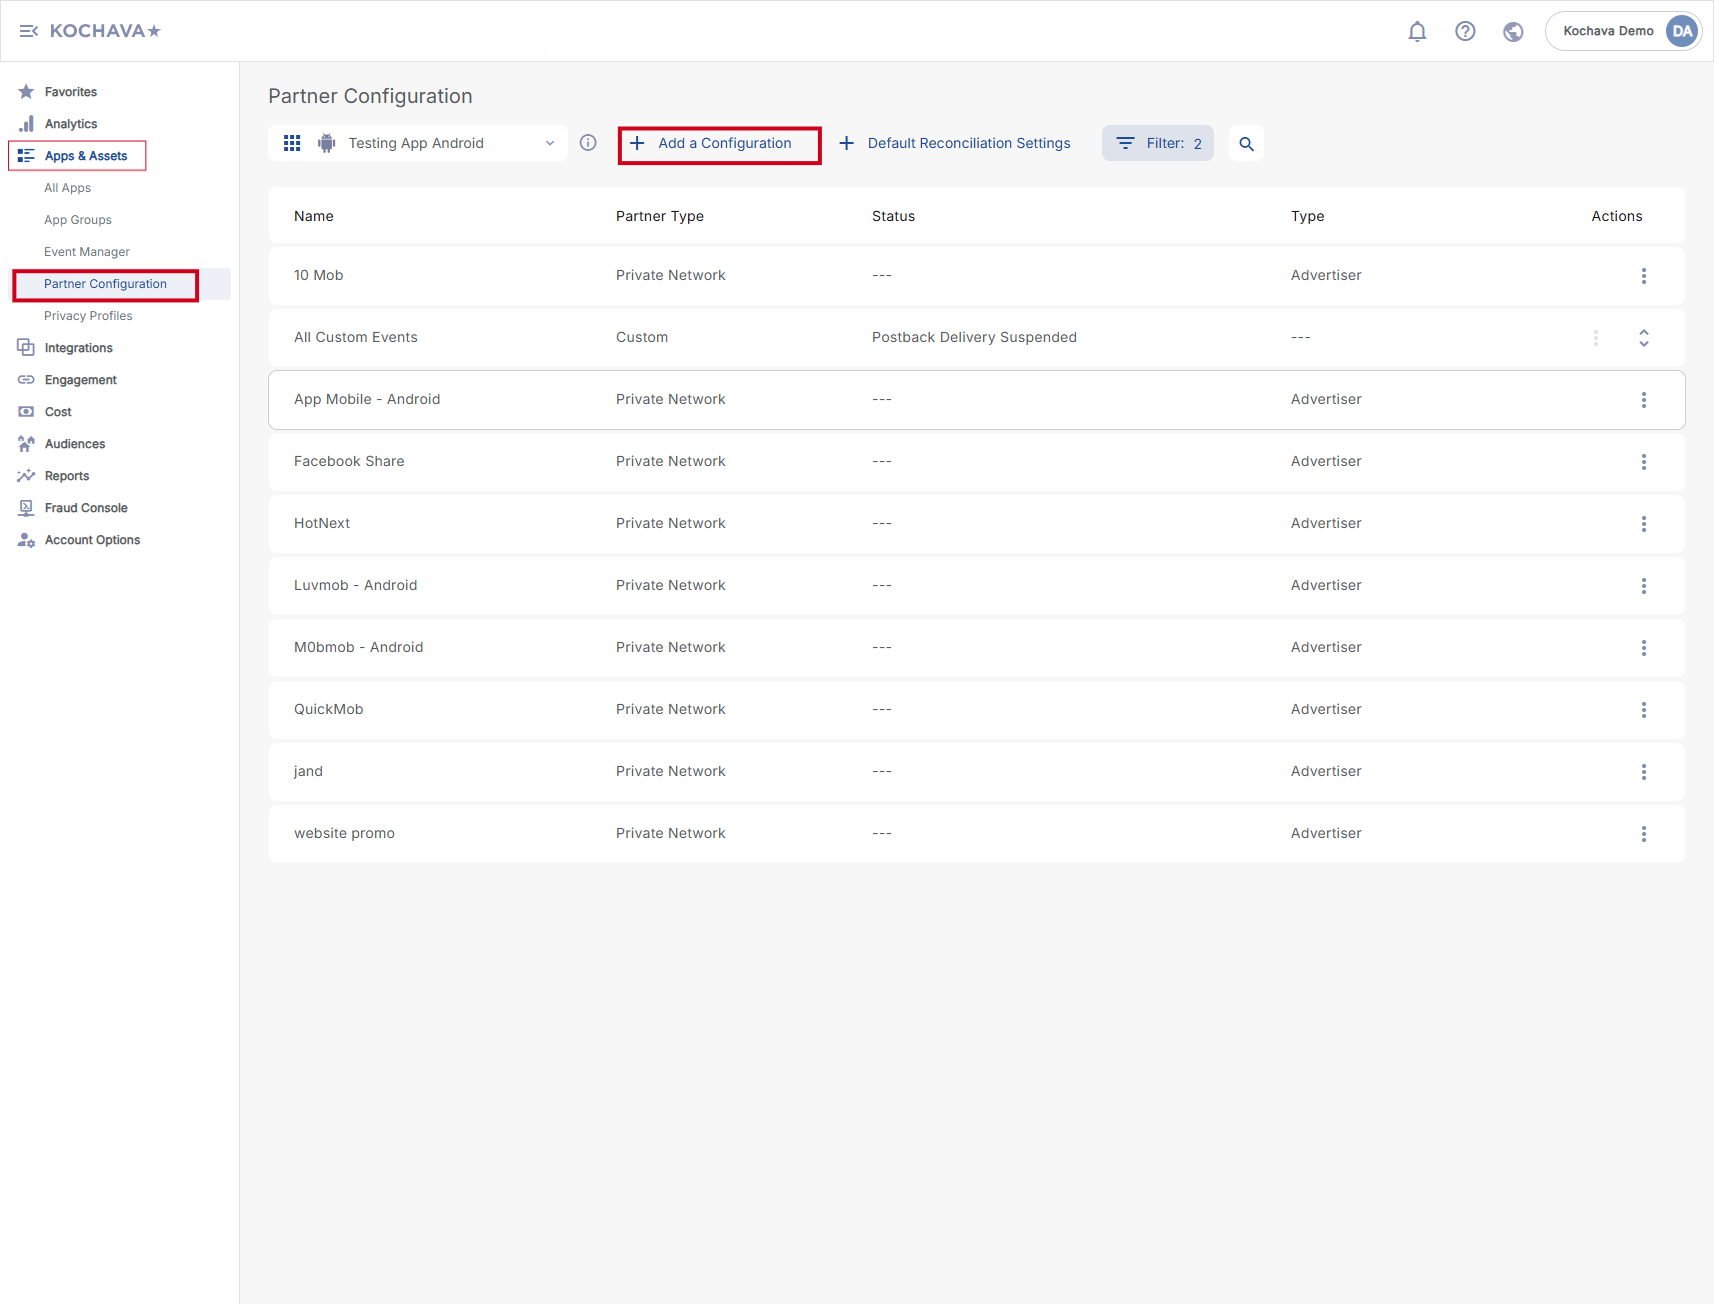
Go to "APP & ASSETS" > "Partner Configuration" and click "Add a Configuration".
If your campaign is targeting Android, choose "Appier - Android" as the Media Partner and click "Go". If your campaign targets iOS, please choose "Appier - iOS".
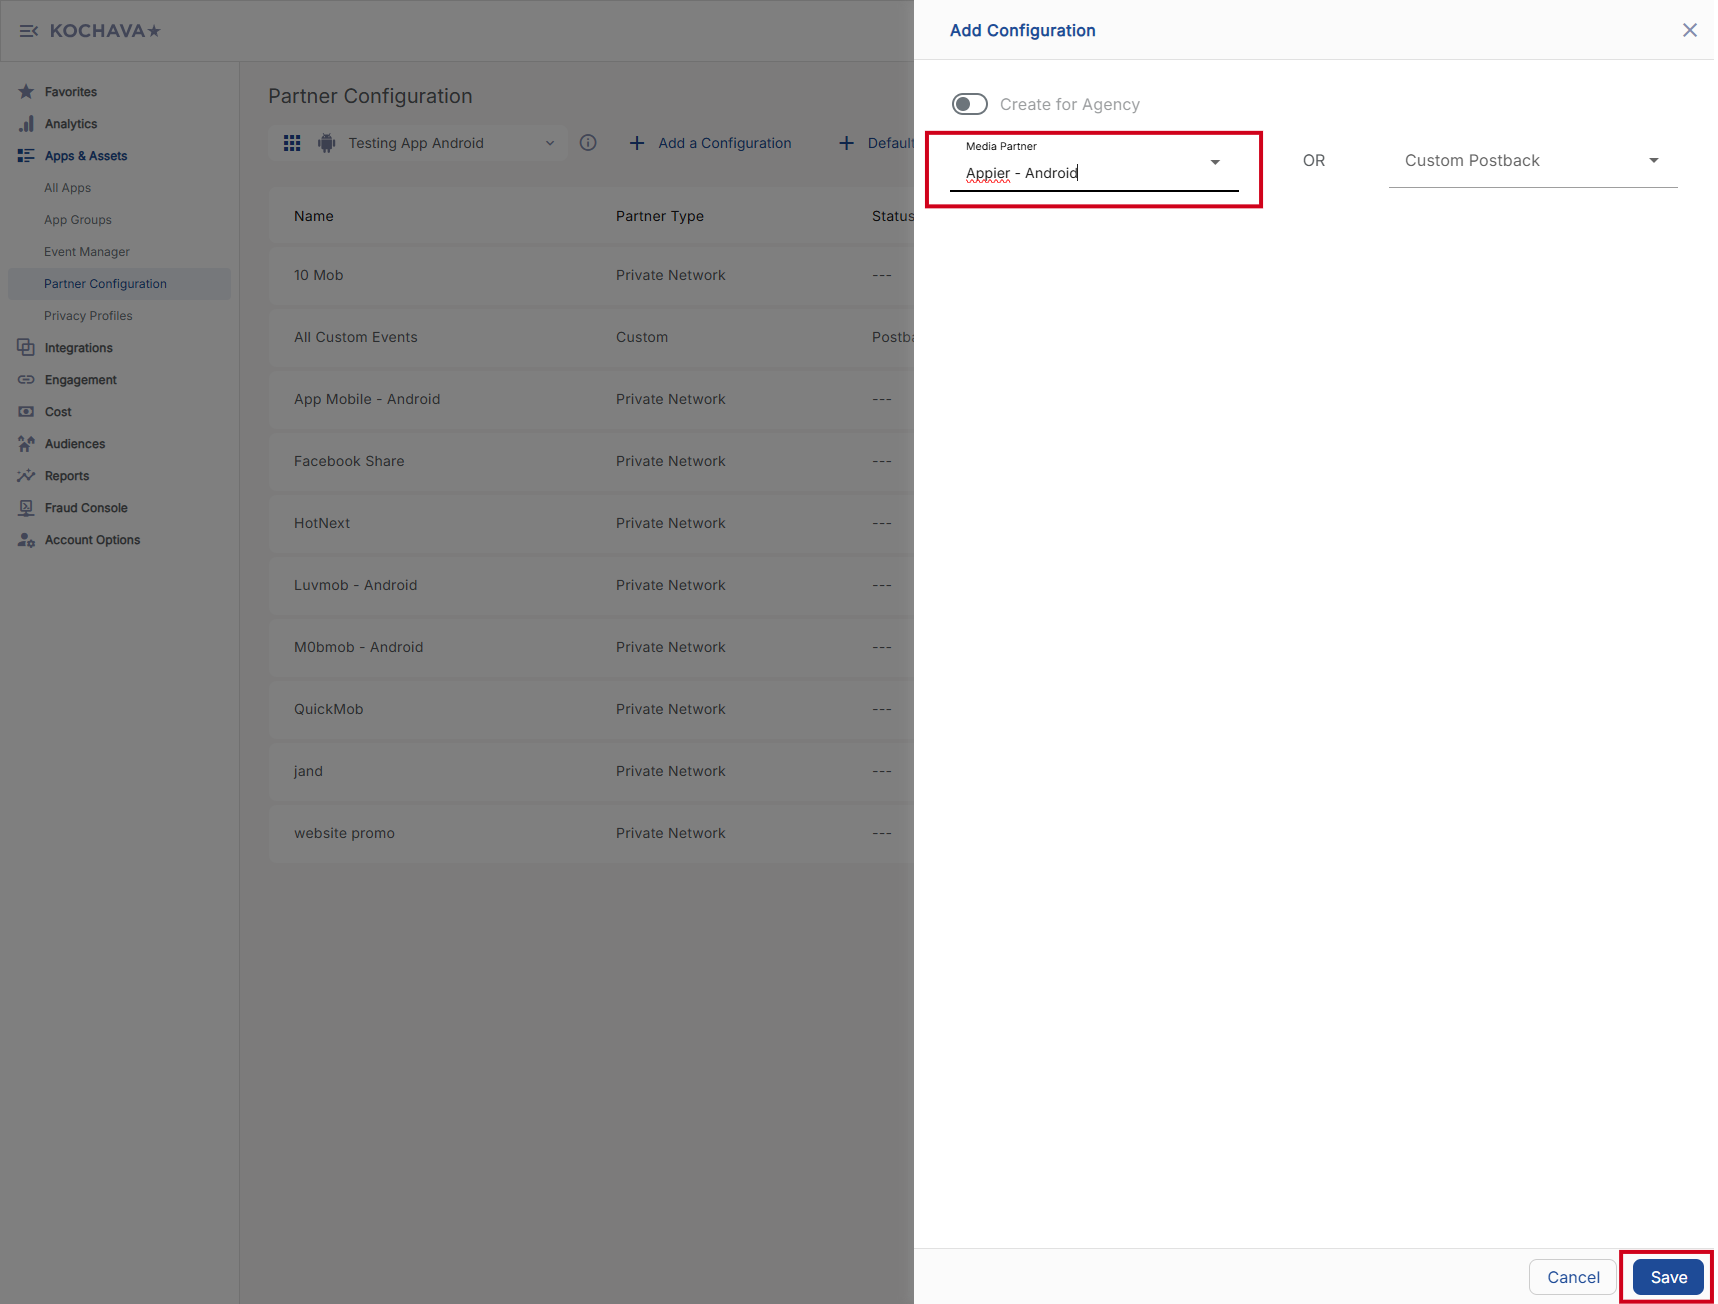
🚧IMPORTANT NOTE
The steps for Android and iOS are the same except where noted in the steps below. All example screenshots below show the setup for Android.
If your campaign will run on both Android and iOS, steps below will need to be repeated for both platforms.
Set up reconciliation
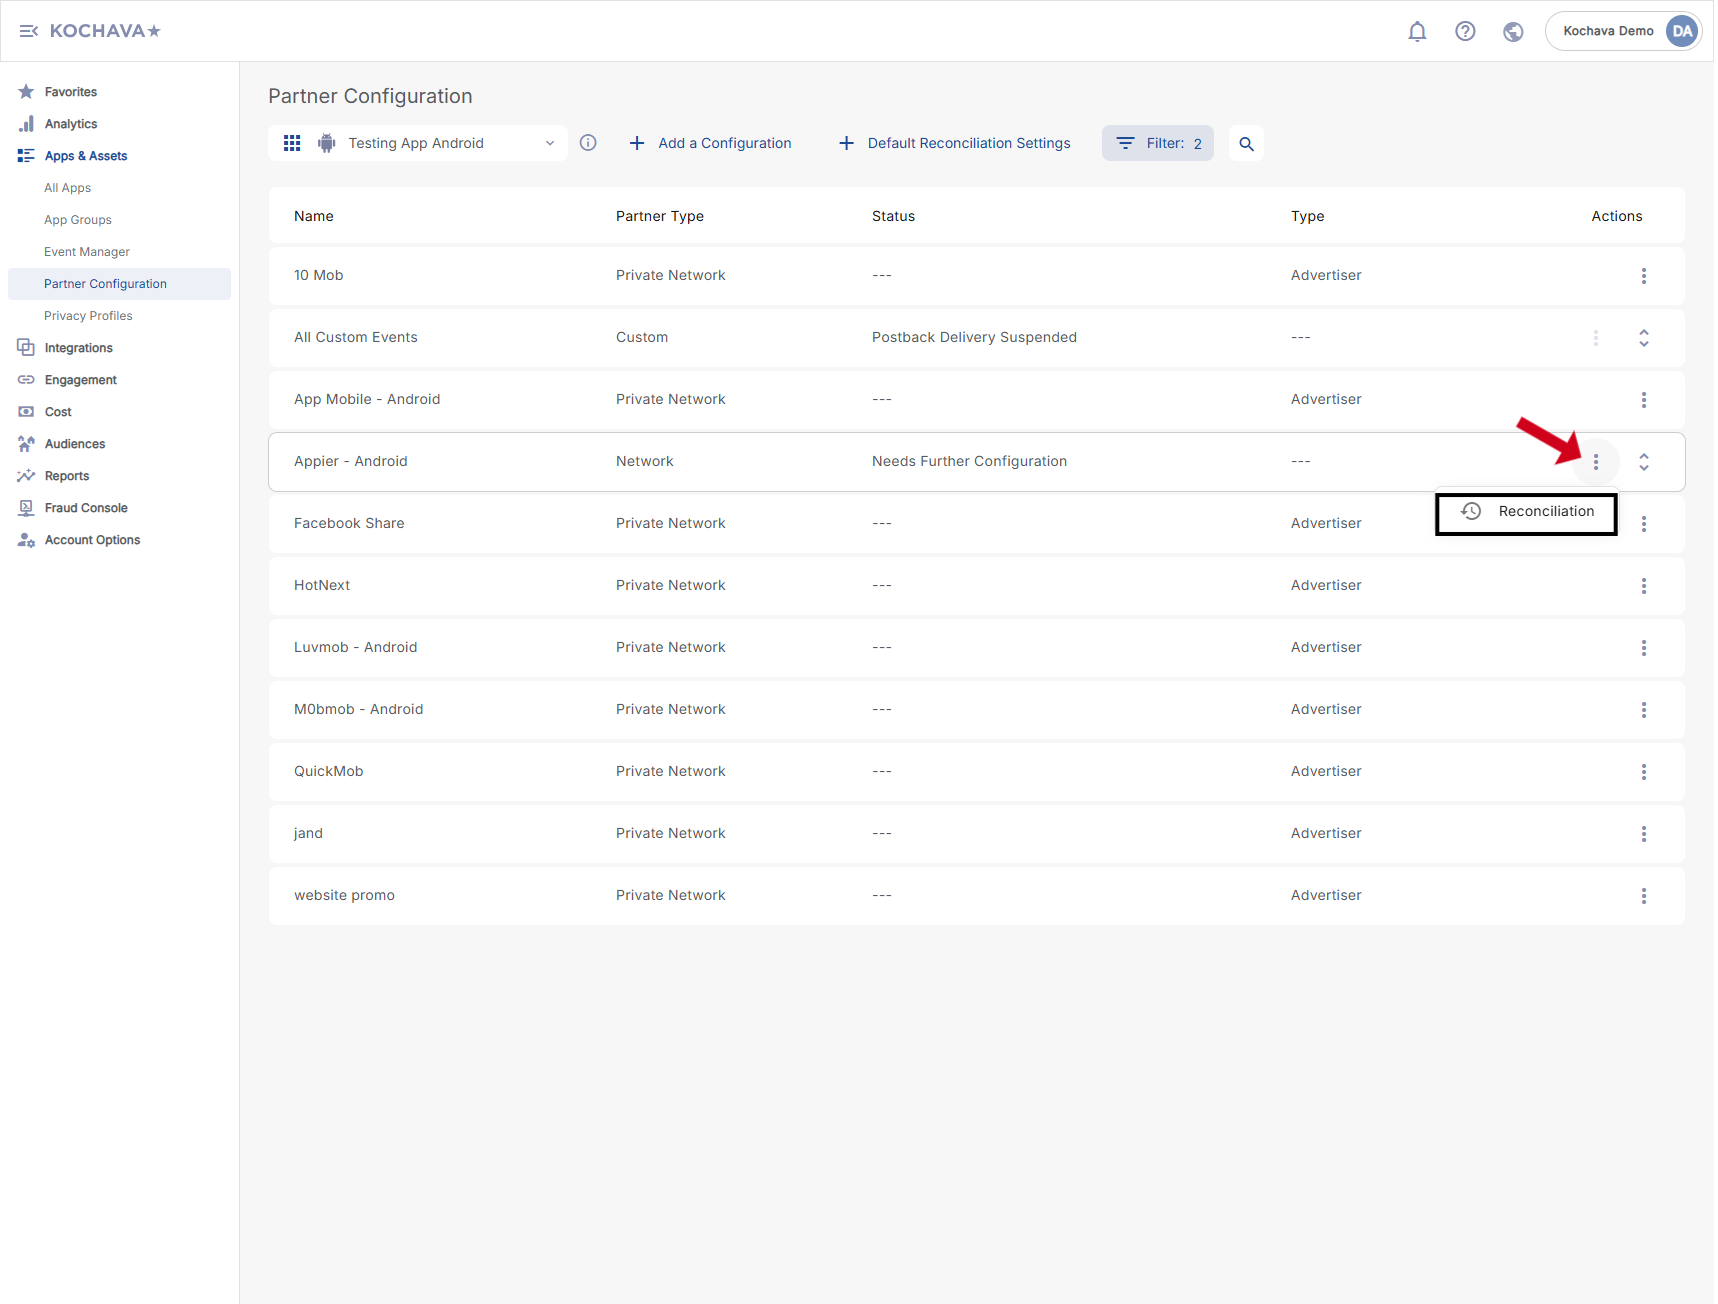
Click the menu button on the right and choose "Reconciliation".
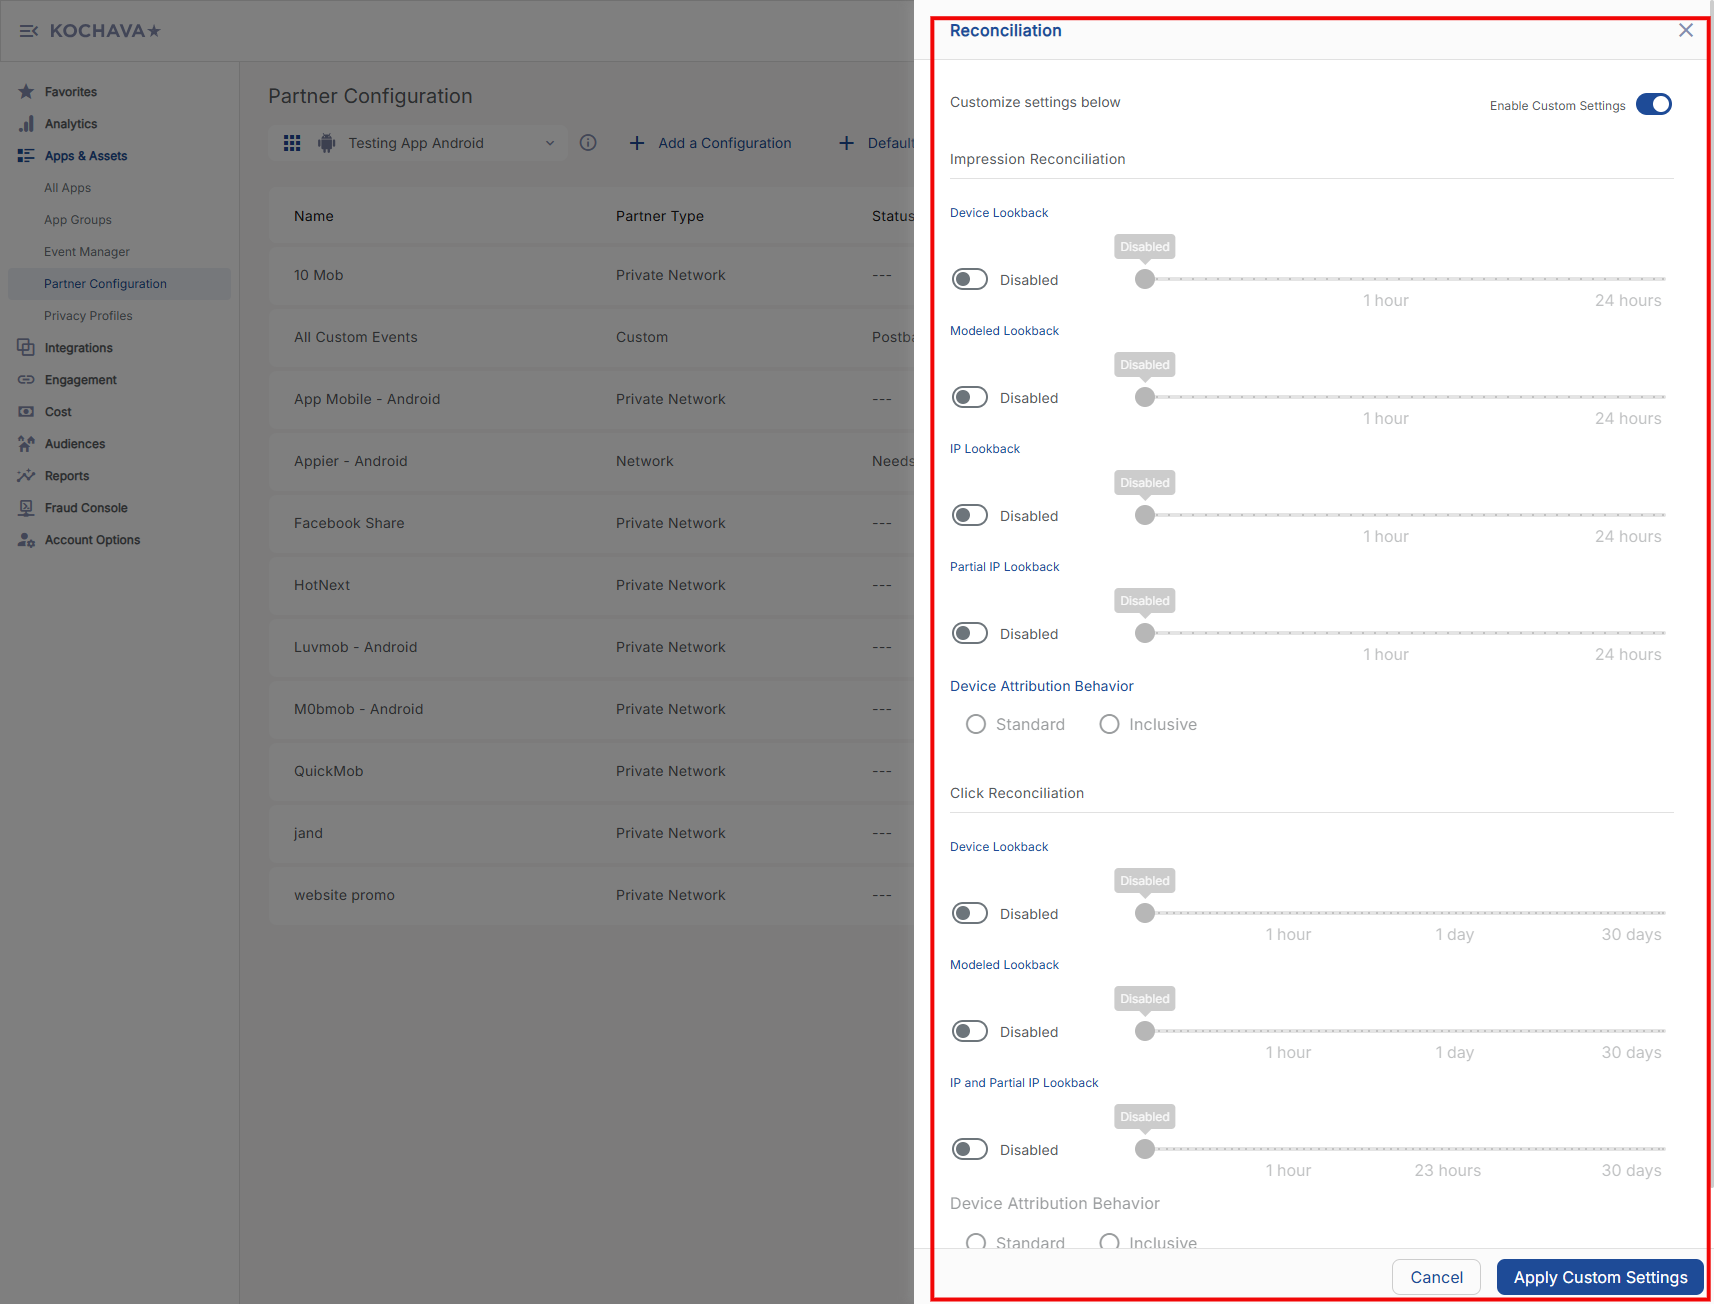
Impression Reconciliation Settings
Please set the attribution windows as outlined in the recommended settings. If your settings are different from the recommended values, please let your Appier point of contact know.
Select the desired Device Lookback. (Default: 24 hours)
Select the desired Modeled Lookback. (Default: 24 hours)
Select the desired IP Lookback. (Default: Disabled)
Select the desired Partial IP Lookback. (Default: Disabled)
Select the desired Device Attribution Behavior. (Default: Standard)

Click Reconciliation Settings
Please set the attribution windows as outlined in the recommended settings. If your settings are different from the recommended values, please let your Appier point of contact know.
Select the desired Device Lookback. (Default: 30 days)
Select the desired Modeled Lookback. (Default: 7 days)
Select the desired IP and Partial IP Lookback. (Default: Disabled)
Select the desired Device Attribution Behavior. (Default: Standard)
Select the desired Modeled Attribution Tier. (Default: Standard)

📘RECOMMENDED ATTRIBUTION WINDOW SETTINGS
Impression device lookback window = 24 hours
Impression fingerprint lookback window = 24 hours
Click device lookback window = 30 days
Click fingerprint lookback window = 7 days
Postback settings
Install Event
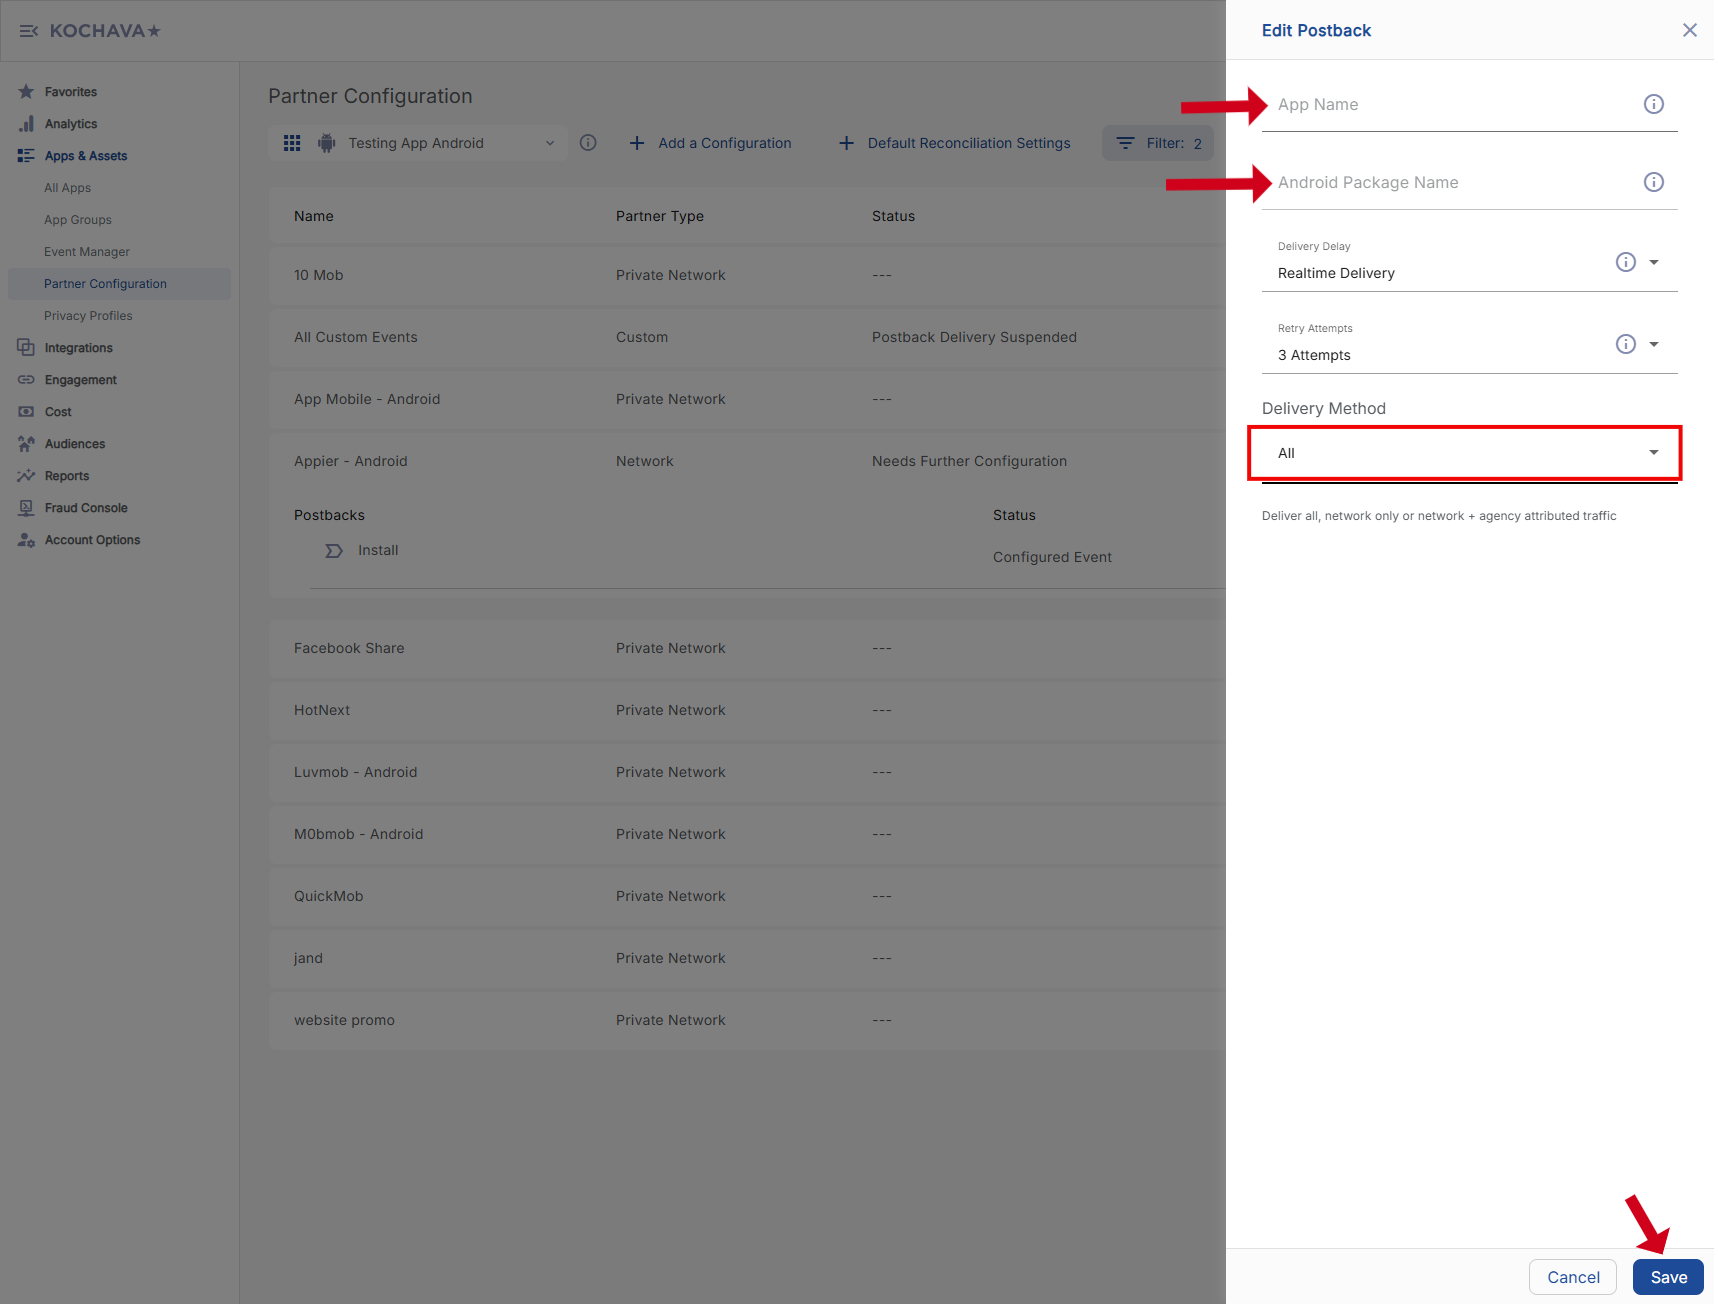
On the Partner Configuration page, click the expand icon on the right and select the pencil icon.
Make sure you see the Install event, before clicking the pencil icon.

For Android setup, fill in the "APP NAME" and "ANDROID PACKAGE NAME" fields. For iOS setup, these fields are called "IOS APP ID" and "IOS BUNDLE ID".
Please make sure the following settings are the same as in the screenshot below:
Delivery Delay: Realtime Delivery
Retry Attempts: 3 Attempts
Delivery Method: All
Ckick Save
📘IMPORTANT NOTE ABOUT DELIVERY METHOD
Selecting All under Delivery Method enables Appier to actively avoid targeting users that already have your app installed. It also enables Appier to target new users that behave or have similar interests to your existing users.
Other Events
For each in-app event, follow the step 2-5 as with the Install event.
Make sure that the status for each event is "Configured Postback".

Share Event Revenue
Go to "Event Manager" menu. For each purchase-related event, make sure that a money icon is displayed for that event.
If this icon is not showing, please click the menu button on the right and click "Revenue" to turn it on.

Create a New Install (Acquisition) Campaign
Go to "Engagement" > "Campaign Manager" and click "Add a Tracker".
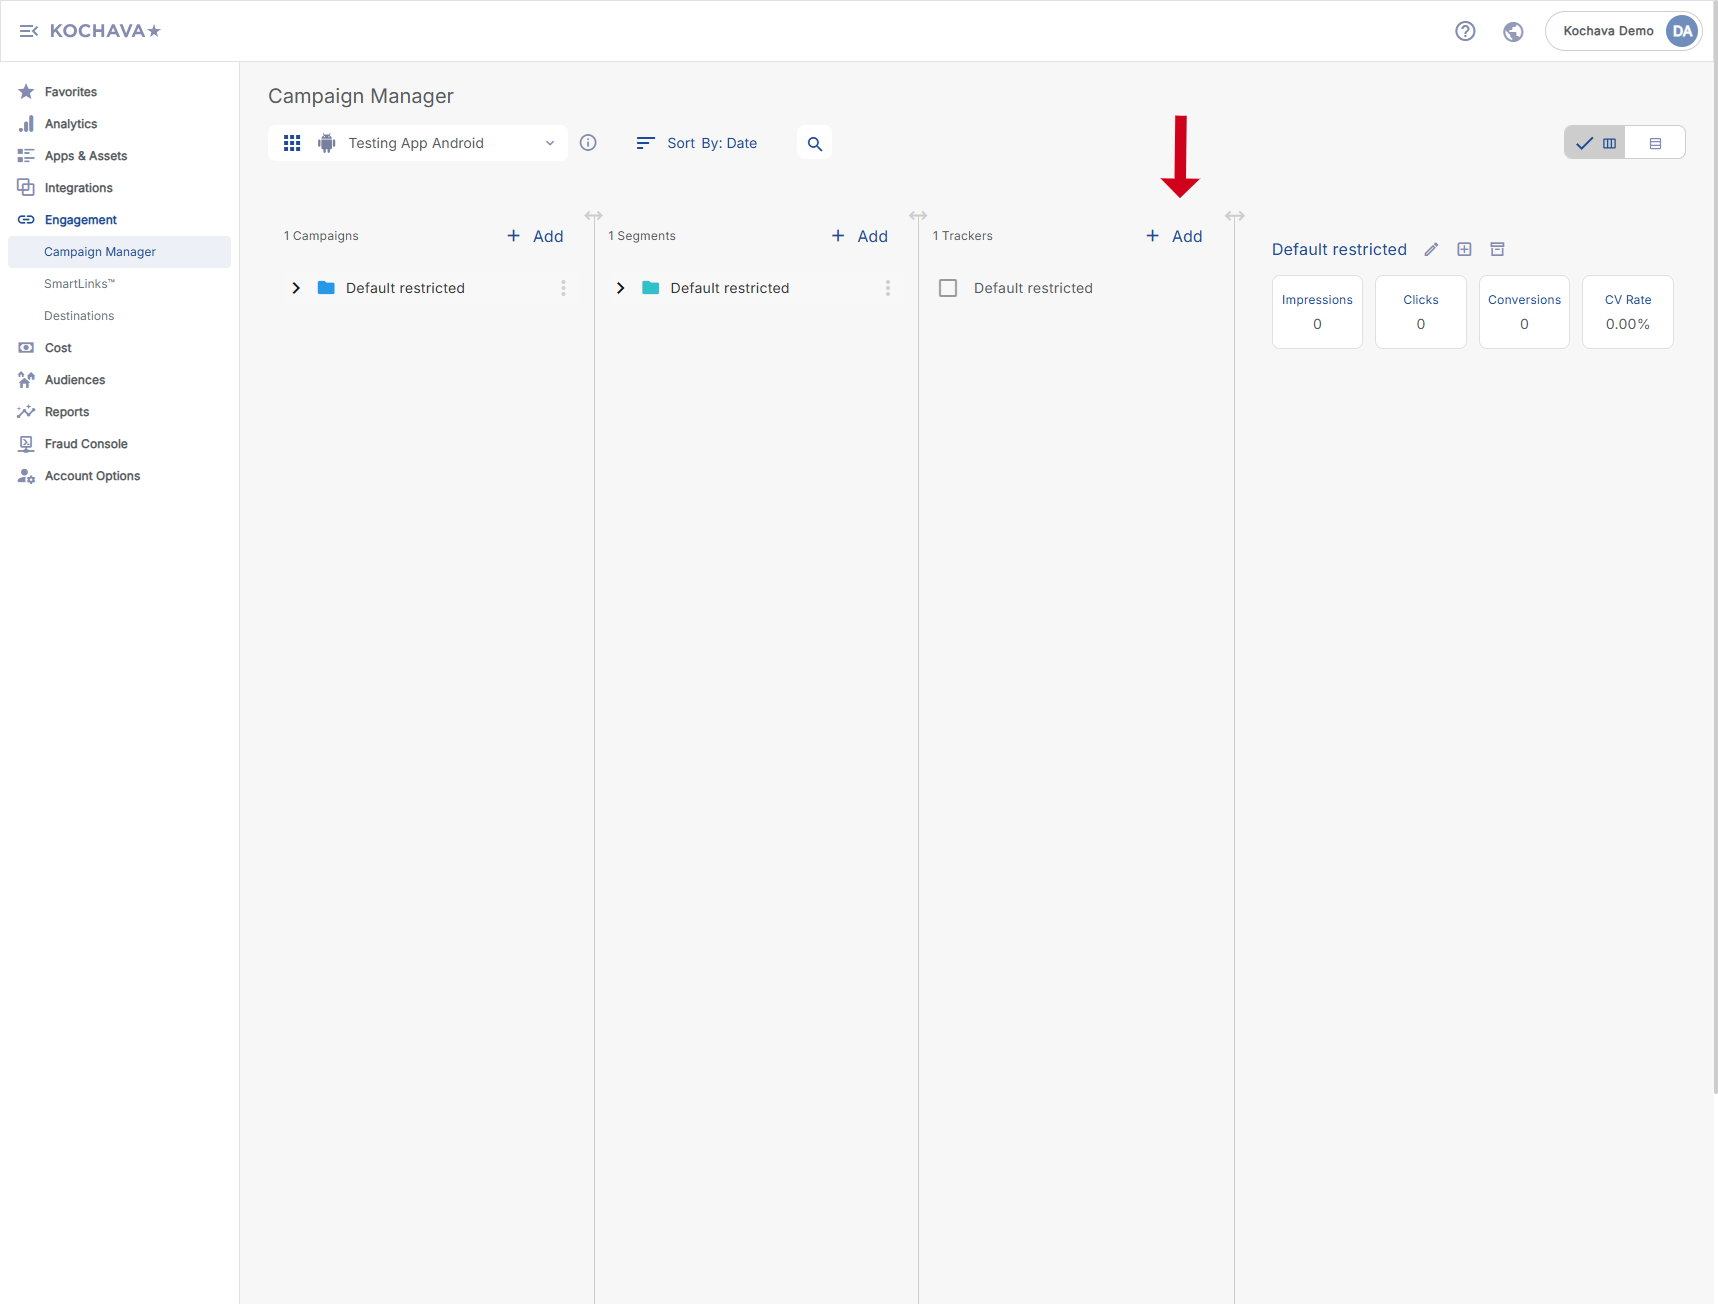
Ass New Tracker
Click + Add (Tracker) or Select Segment Tools (⋮) > Add Tracker.
Enter Tracker Name.
Select Tracker Type > Acquisition.
Select a Media Partner as "Appier - Android" or "Appier- iOS", depending on the platform that the campaign is targeting.
Select the Destination URL Type as Custom, and fill in the correct Google Play/App store link.
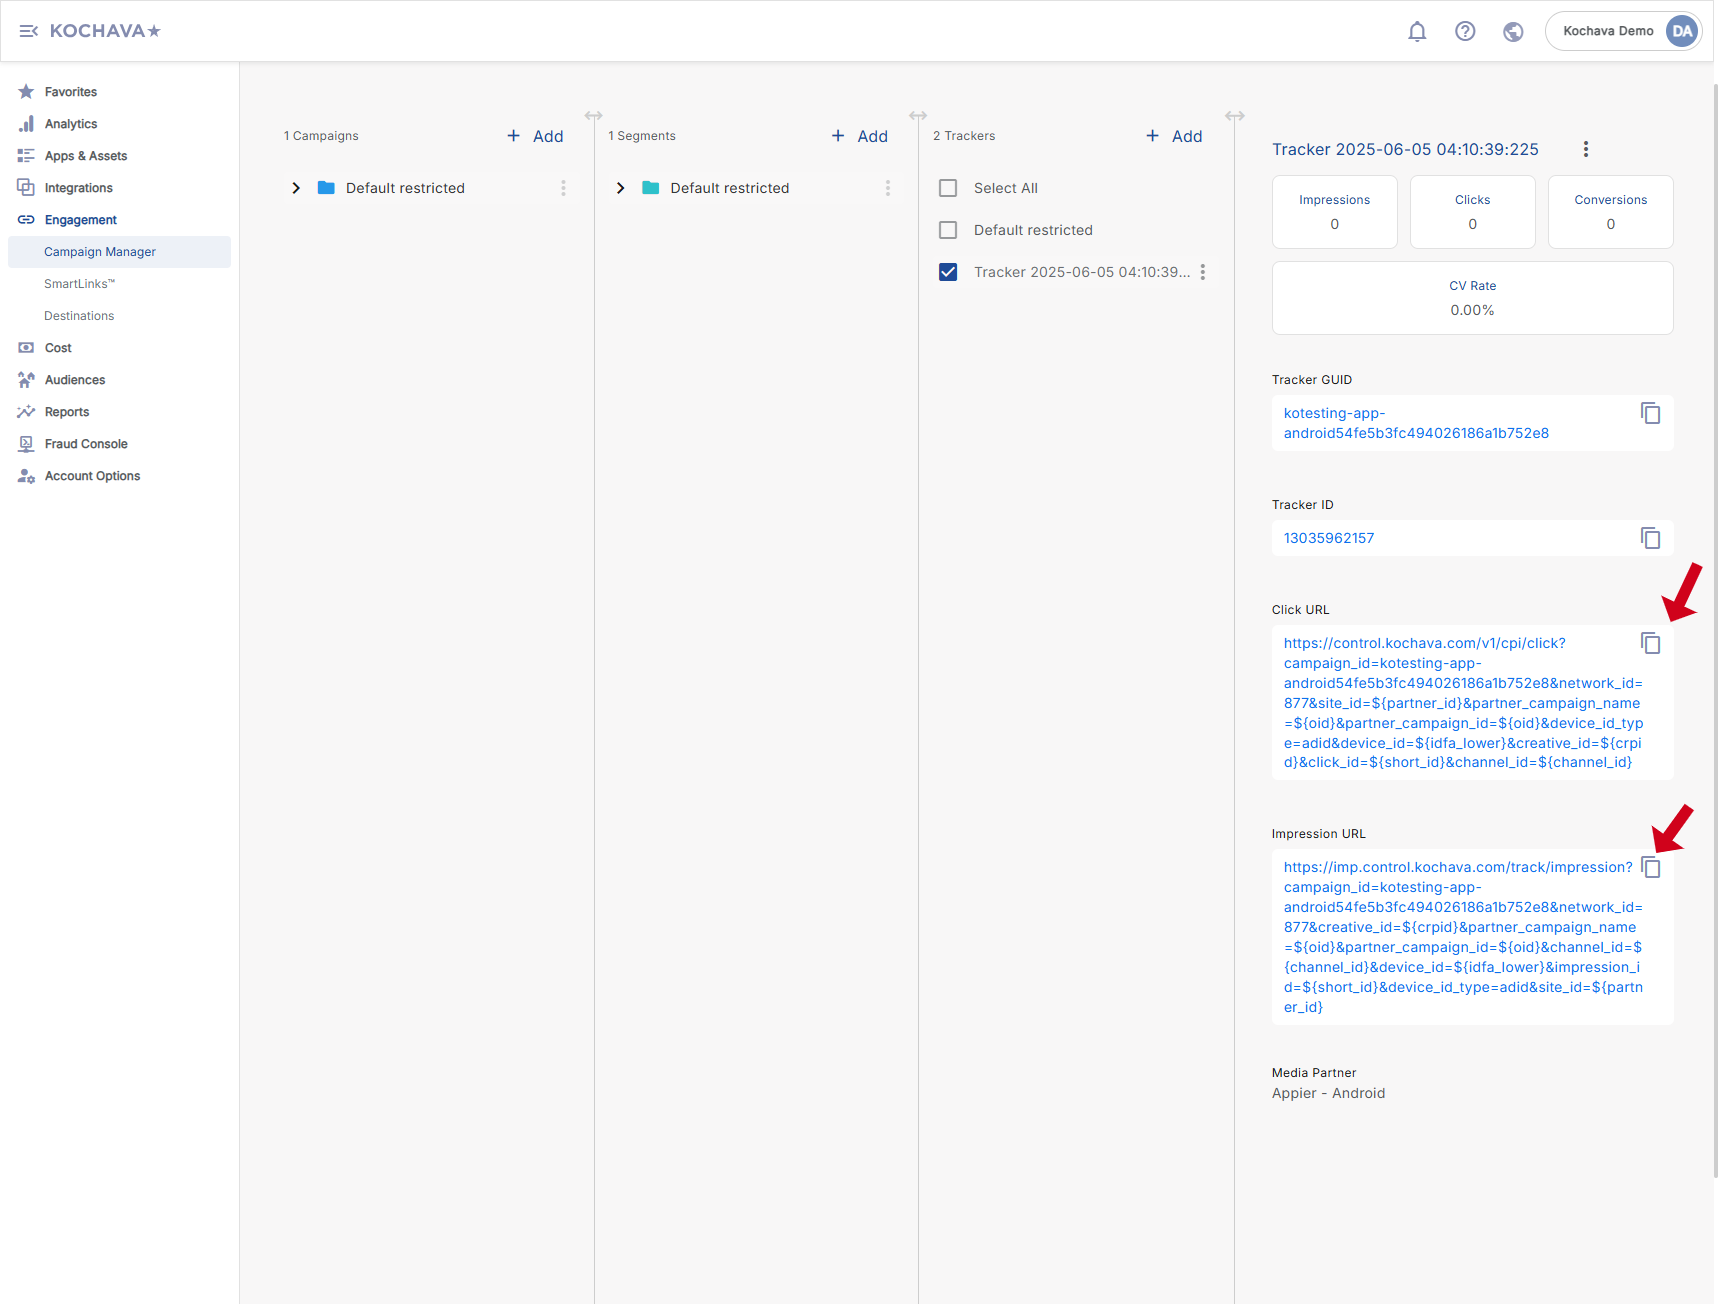
Click Save (If no further trackers need to be created).

Share the Click URL and Impression URL to Appier.
Last updated